[nextpage title=”Introduction”]
The L700 Eclipse is the latest mid-tower case from the South-Korean 3R System, coming with three two-speed fan controllers and an external hard drive/SSD docking bay. Let’s check it out.
The reviewed case is available in three versions: “H” (“High-end”), “N” (“Normal”), and “E” (“Economic”). The “E” version has only one hard drive cage, supporting four hard drives, while the other two versions have two hard drive cages, supporting a total of seven hard drives. On the “H” version, the bottom hard drive cage has bays with a suspension mechanism called “Noise Killer.” The sample we received was for the “H” version.
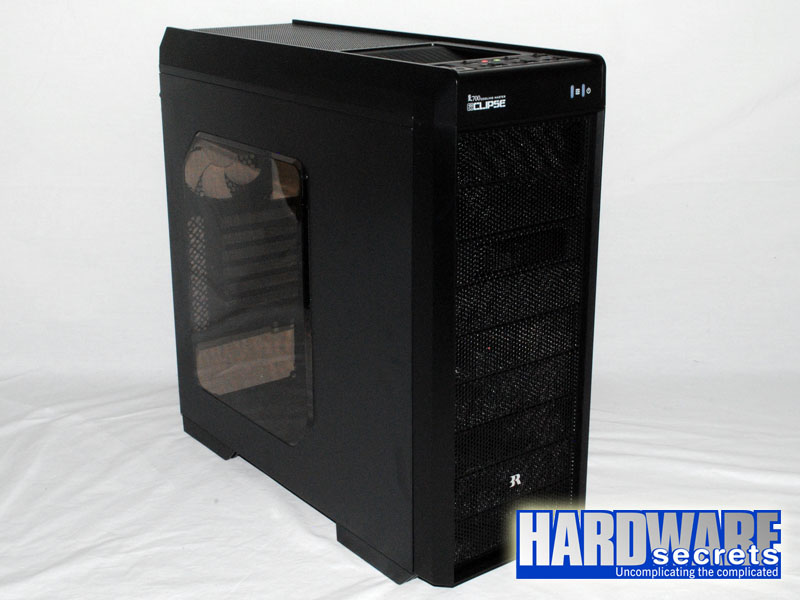 Figure 1: 3R System L700 Eclipse case
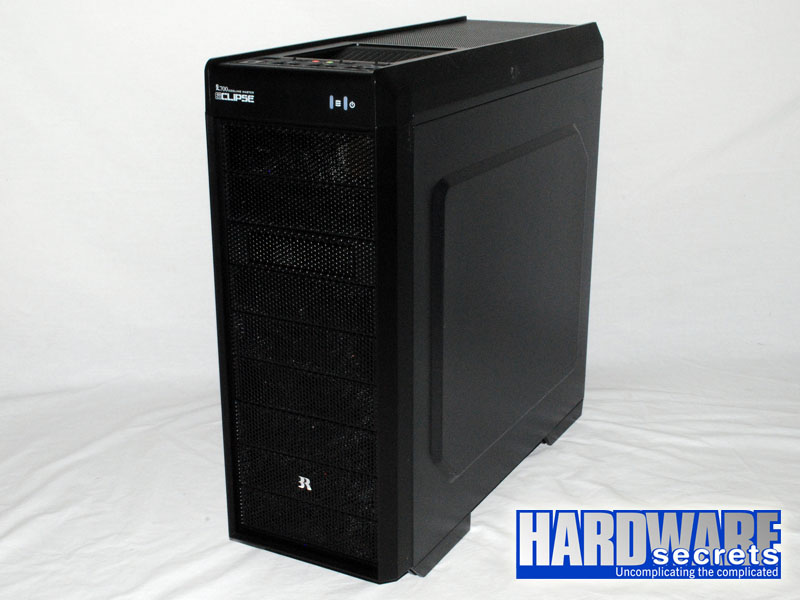 Figure 2: 3R System L700 Eclipse case
The left panel has a big tinted window. The case doesn’t support the installation of fans on this panel.
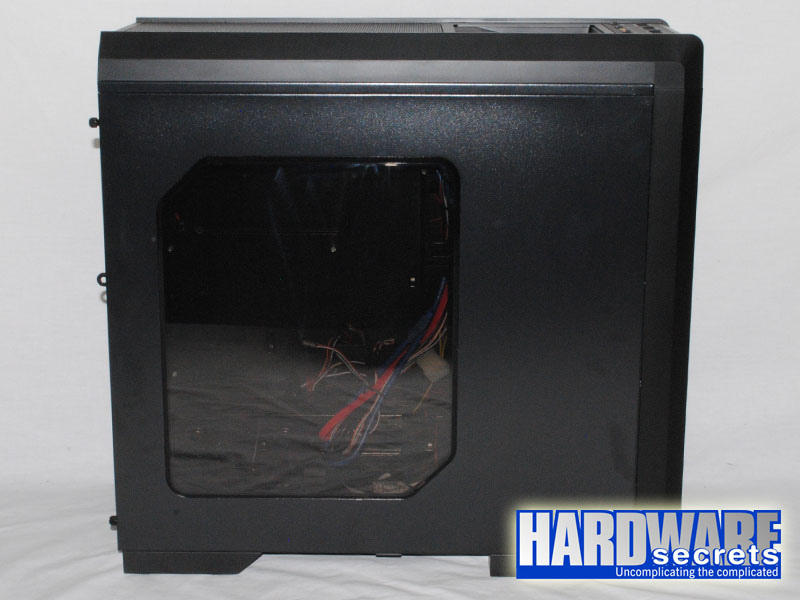 Figure 3: Left panel
[nextpage title=”The Front Panel”]
At a first glimpse, it looks like the 3R System L700 Eclipse has a total of nine 5.25” bays, but it actually has only three external 5.25” bays, with the third one coming with a bezel for external 3.5” devices. The front panel is equipped with meshed covers with air filters. There are two 120 mm fans on the front panel, which glow white when turned on. These fans are connected to an individual two-step speed controller on the top panel, and must be connected directly to the power supply using a standard peripheral power plug. No technical specifications for these fans are available.
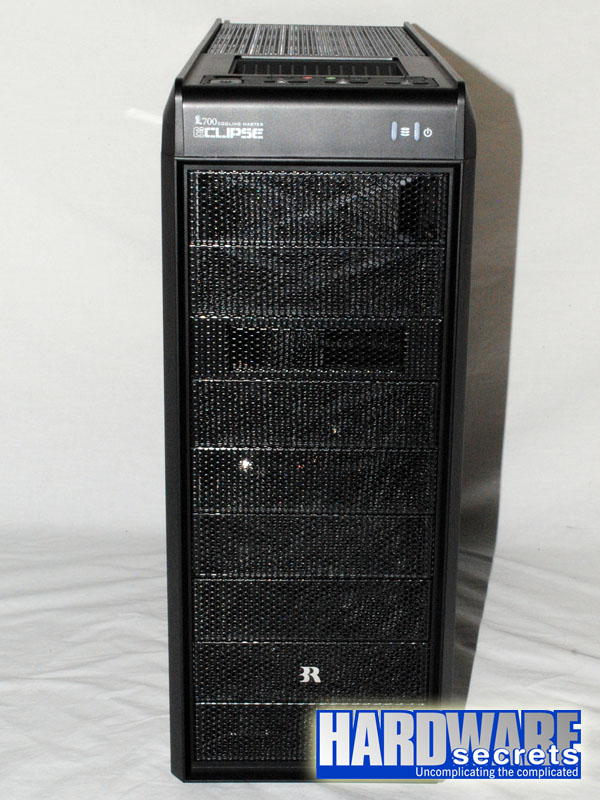 Figure 4: Front panel
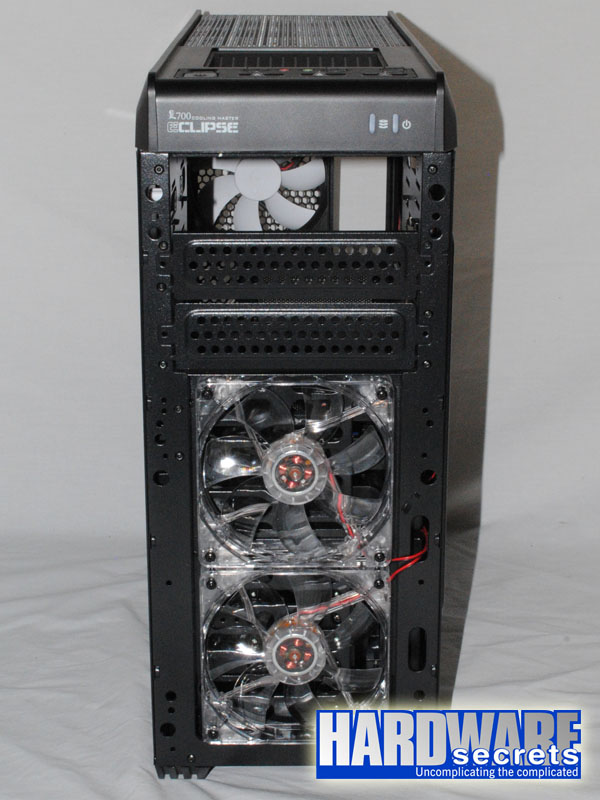 Figure 5: Front fans
[nextpage title=”The Top Panel”]
The top panel of the 3R System L700 Eclipse is meshed with an air filter, and it comes with two 120 mm fans installed. See Figures 6 and 7. Both are connected to an individual two-step speed controller, and must be connected directly to the power supply using a standard peripheral power plug. No technical specifications for these fans are available.
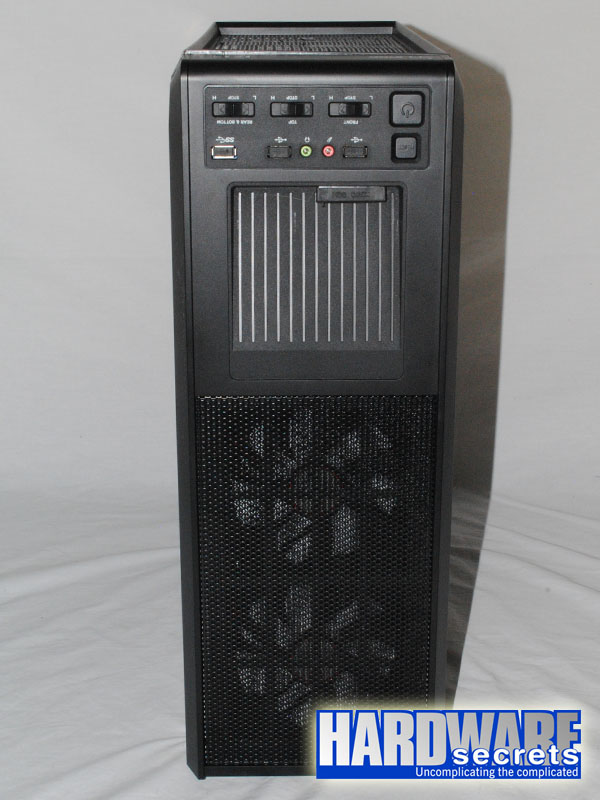 Figure 6: Top panel
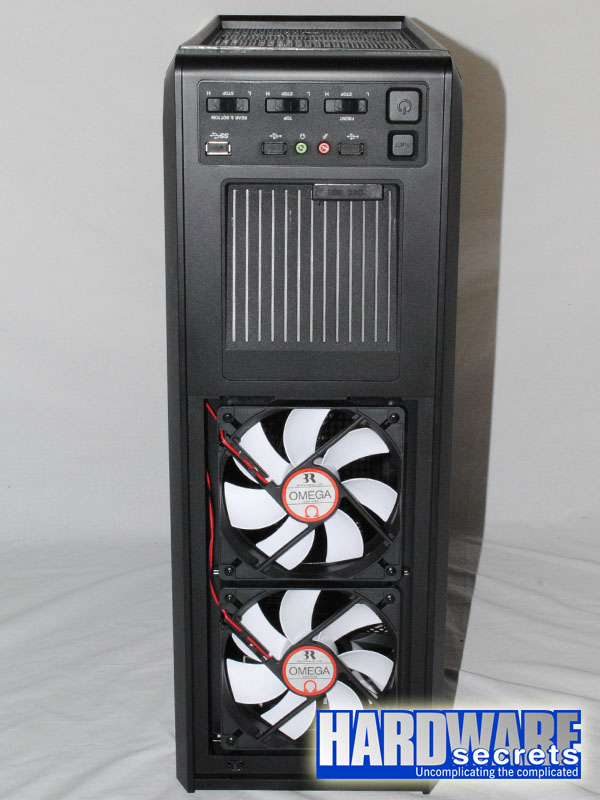 Figure 7: Top panel
The case comes with three separate two-step speed controllers for the fans, one for the front fans, one for the top fans, and one for the rear and bottom fans. It also comes with two USB 2.0 ports, one USB 3.0 port, and the traditional audio jacks. The USB 3.0 port utilizes an internal connector, so you must use a motherboard with a USB 3.0 header if you want to use this port.
One of the highlights of the reviewed case is the presence of an external docking bay for hard drives or SSDs, supporting 3.5” and 2.5” devices.
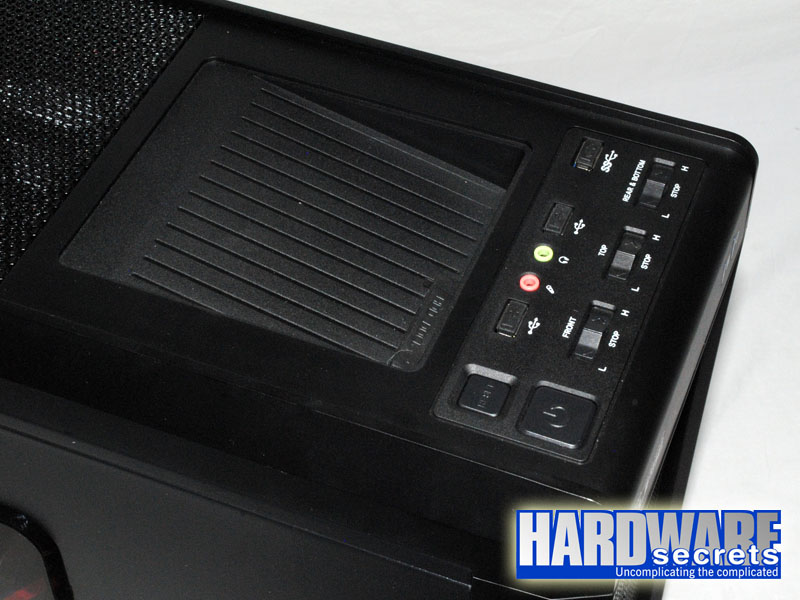 Figure 8: Buttons, connectors, and the docking bay
[nextpage title=”The Bottom and Rear Panels”]
The bottom panel has air filters for the power supply fan and for the bottom fan.
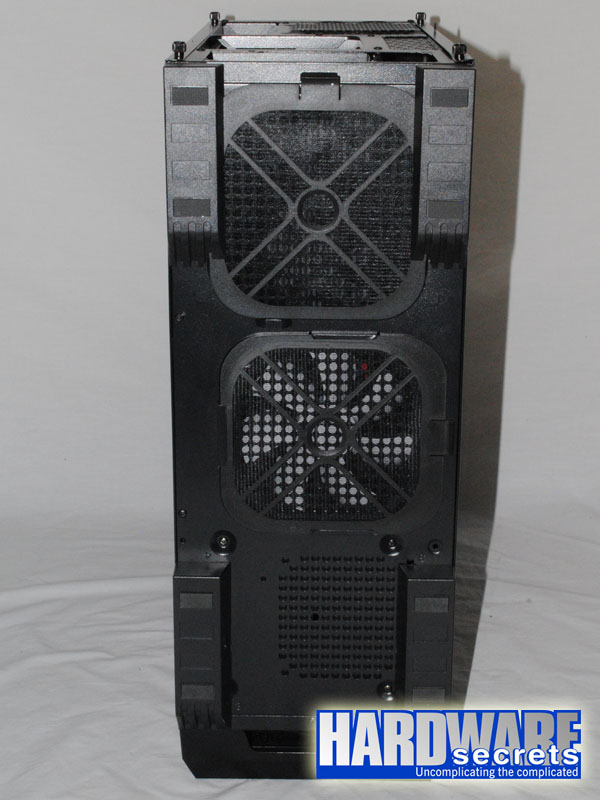 Figure 9: Bottom panel
The rear panel and the interior of the 3R System L700 Eclipse are painted black.
The case has seven expansion slots, using meshed covers.
There is a 120 mm fan on the rear panel, which is connected to the same two-step speed controller as the bottom fan. It must be connected directly to the power supply using a standard peripheral power plug. No technical specifications for this fan are available.
On the 3R System L700 Eclipse, the power supply goes on the bottom part of the case.
There are two holes protected with rubber covers for hoses of liquid cooling solutions, each measuring 0.79” (20 mm) in diameter.
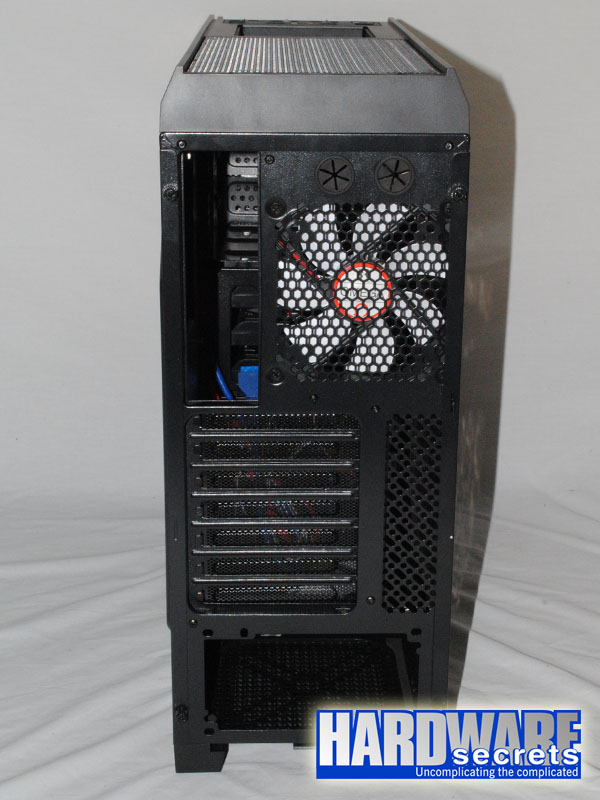 Figure 10: Rear panel
The reviewed case has a tab for you to install a padlock or a warranty seal, in order to prevent unauthorized people from opening the computer.
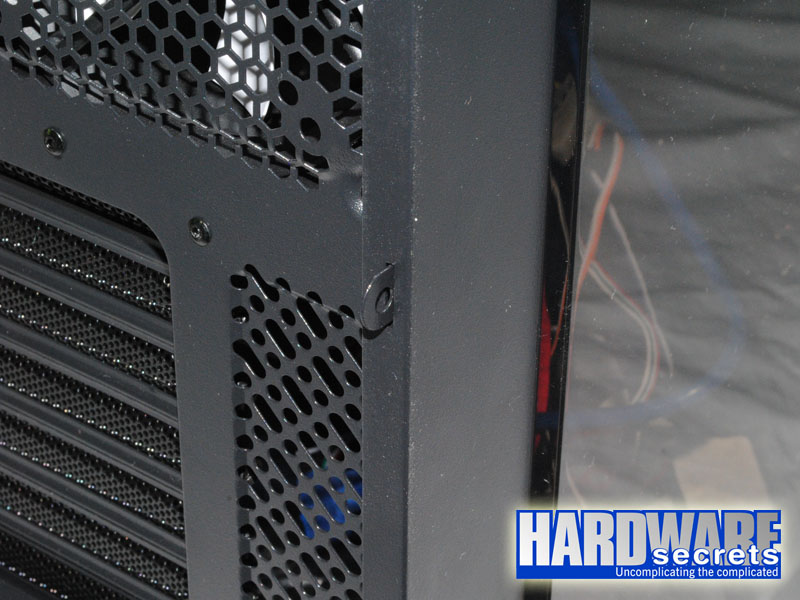 Figure 11: Tab for padlock or warranty seal
Let’s now take a look inside the 3R System L700 Eclipse.
[nextpage title=”Inside the 3R System L700 Eclipse”]
Both panels are attached to the chassis using black thumbscrews. The motherboard tray has a huge hole for you to access the backplate of the CPU cooler without having to remove the motherboard from the case, several holes for you to route cables behind it, and several metallic clips for you to fasten cables using cable ties.
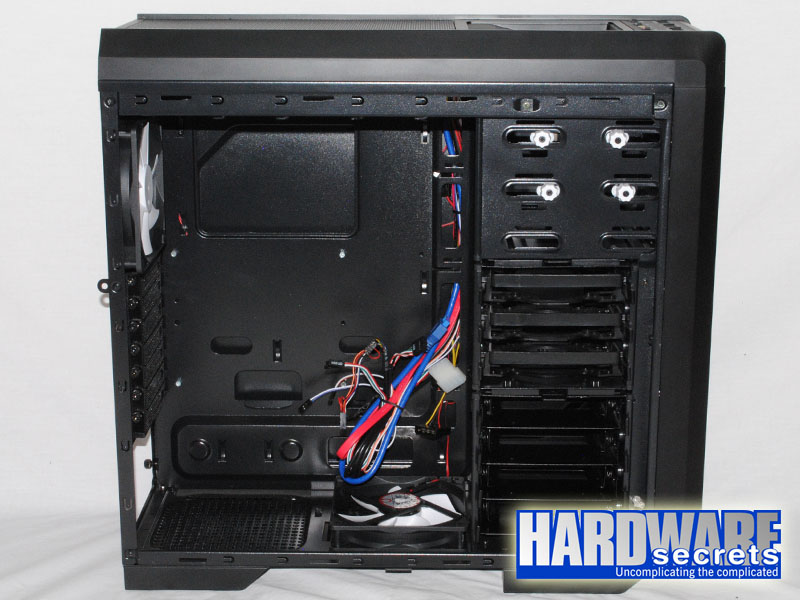 Figure 12: Overall look
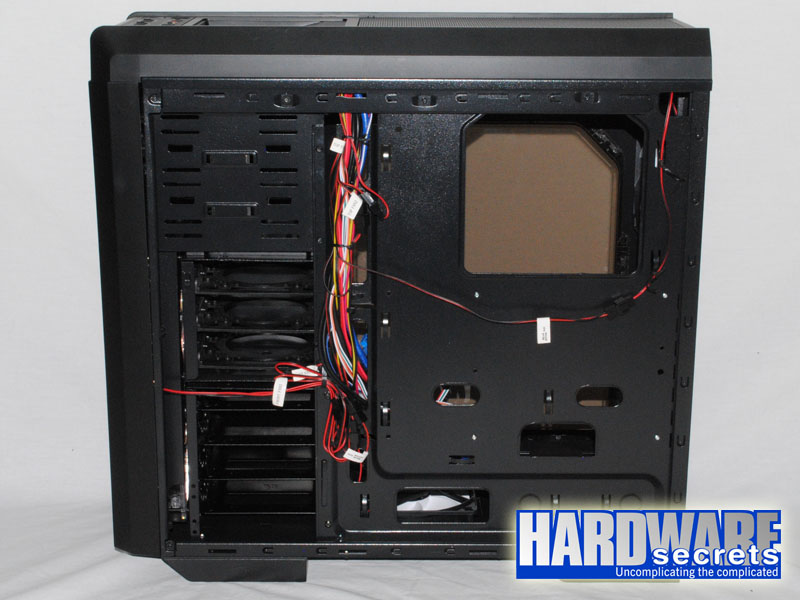 Figure 13: A view behind the motherboard tray
Figure 14 gives you another overall look inside the case. Expansion cards are fastened using black thumbscrews. The 3R System L700 Eclipse supports video cards up to 11” (280 mm) long on its default configuration or up to 16.1” (410 mm) if the top hard drive cage is removed.
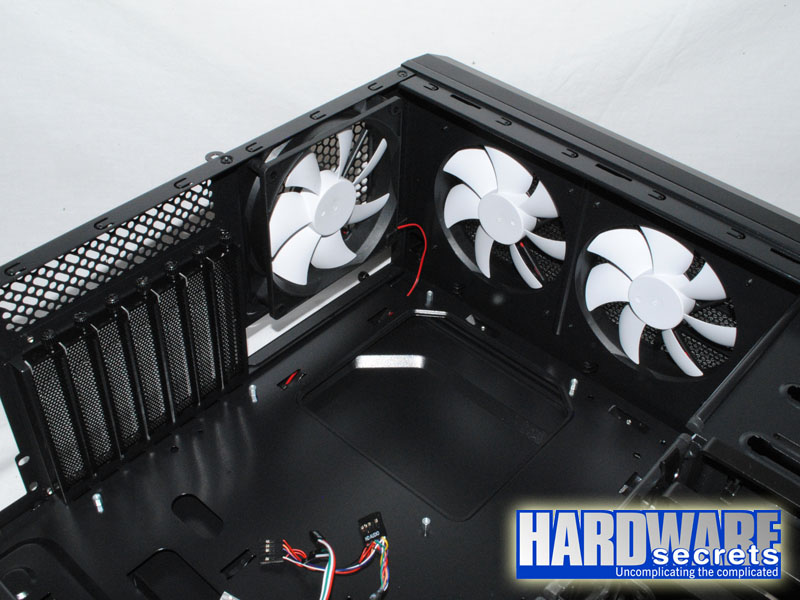 Figure 14: Overall look
As already explained, the power supply is installed at the bottom of the case. Note that it can be installed with either its bottom fan facing up or facing down, so you can decide if you want the fan of your power supply pulling air from inside the case or from outside of it. As already shown, there is an air filter for the power supply fan.
The 3R System L700 Eclipse comes with a fan on its bottom panel, which is connected to the same two-step speed controller as the rear fan. It must be connected directly to the power supply using a standard peripheral power plug. No technical specifications for this fan are available.
Because of the presence of the bottom fan, you can only install power supplies up to 6.7” (170 mm) deep. If you want to install a deeper power supply, you will have to remove the bottom fan.
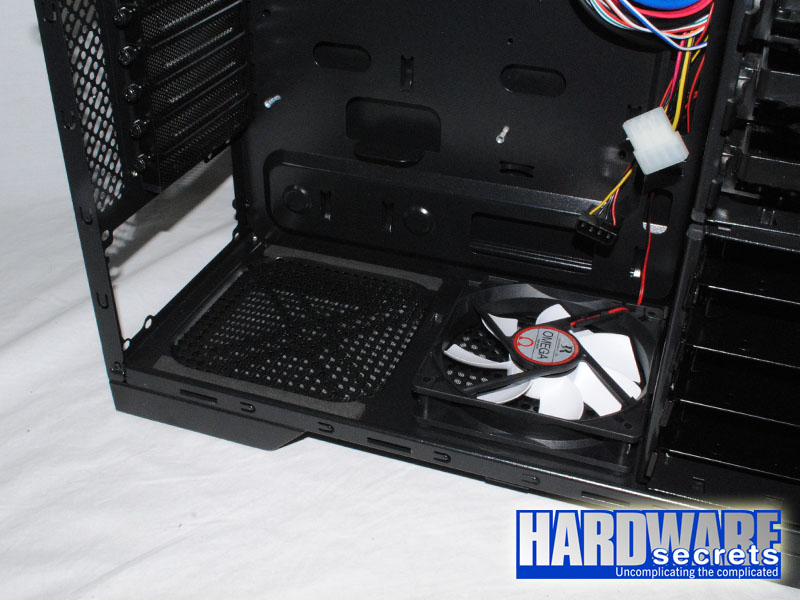 Figure 15: Power supply compartment
[nextpage title=”The Disk Drive Bays”]
The 3R System L700 Eclipse has three 5.25” external bays, seven 3.5”/2.5” internal bays (four in the “E” version of the case), and one 3.5”/2.5” external docking bay. The case comes with one adapter to convert one of the external 5.25” bays into an external 3.5” bay. Only the top two external 5.25” bays come with mechanisms for installing drives without the use of tools or screws.
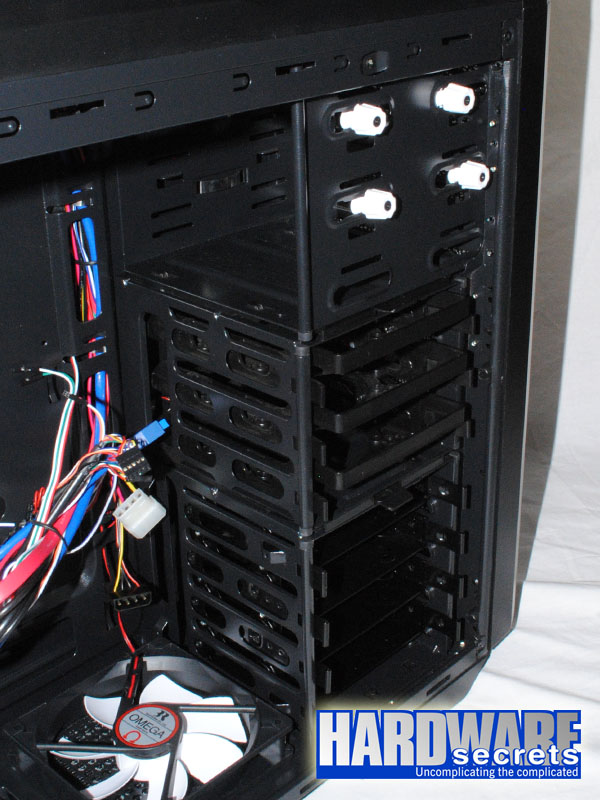 Figure 16: Disk drive bays
As mentioned previously, the reviewed case supports video cards up to 11” (280 mm) long on its default configuration or up to 16.1” (410 mm) if the top hard drive cage is removed.
 Figure 17: Case with its top cage removed
The top hard drive cage has three 3.5”/2.5” bays, while the bottom one has four 3.5”/2.5” bays. The “E” version of the case doesn’t come with the top hard drive cage. The “H” version of the case, which was the one we are reviewing, comes with suspension mechanisms for reducing noise in the bays available on the bottom hard drive cage, but you must use regular screws to install 3.5” and 2.5” drives. In Figure 18, you can compare one regular 3.5”/2.5” bay to one “Noise Killer” bay. The regular 3.5”/2.5” bays allow you to install 3.5” hard drives without the use of screws or tools.
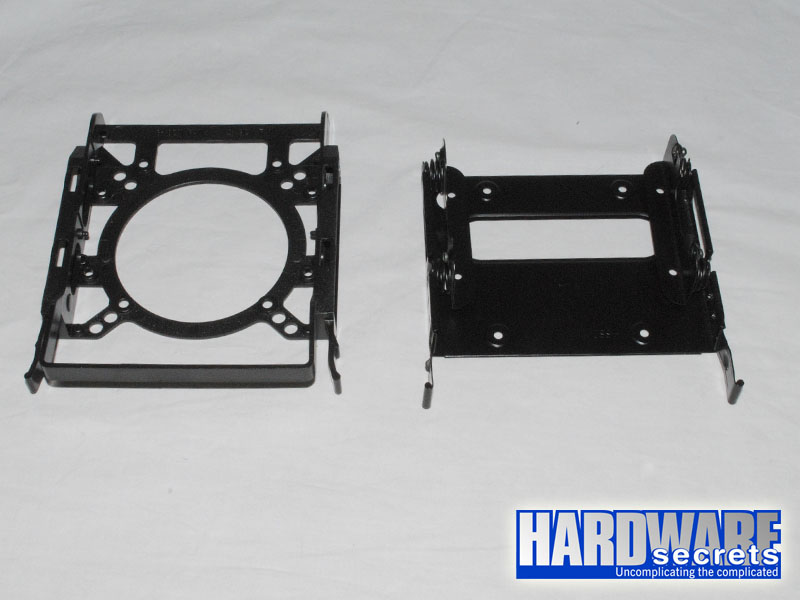 Figure 18: Regular 3.5”/2.5” bay (left) and “Noise Killer” bay (right)
[nextpage title=”Main Specifications”]
The main specifications for the 3R System L700 Eclipse include:
- Style: Mid-tower
- Application: ATX and smaller form factors
- Material: Zinc-coated steel (SECC) body
- Power supply: Doesn’t come with the product
- Available colors: Black
- Side panel: Tinted window
- Dimensions: 18.5 x 7.7 x 19.4 inches (470 x 195 x 492 mm) (H x W x D)
- Net weight: 16 Lbs (7.2 kg)
- Gross weight: 18.5 Lbs (8.4 kg)
- Bays: Three external 5.25” bays, one external 3.5” bay (converted from one 5.25” bay), one external 3.5”/2.5” docking bay, and seven internal 3.5”/2.5” bays
- Expansion slots: Seven
- Maximum video card length: 11” (280 mm) or 16.1” (410 mm) if the top hard drive cage is removed
- Maximum CPU cooler height: NA
- Fans: Two 120 mm fans on the front panel (white LEDs, two-step speed controller), two 120 mm fans on the top panel (two-step speed controller), one 120 mm fan on the rear panel (two-step speed controller), and one 120 mm fan on the bottom panel (two-step speed controller)
- Optional fans: None
- Extra Features: Tab for padlock or warranty seal
- More Information: https://www.3rsys.com
- MSRP in the U.S.: NA
[nextpage title=”Conclusions”]
Although the quality of the plastic parts of the L700 Eclipse continues to be the same as the other cases from 3R System we’ve reviewed to date, this is by far the most complete case we’ve seen from this manufacturer. Since 3R System targets their products to the budget-minded user, we think the L700 Eclipse is a good buy for users who want an affordable case with features usually only seen on more expensive models.
Strong Points
- External 3.5”/2.5” docking bay
- Vented covers with air filters on the front panel
- Air filter for the front, top, bottom, and power supply fans
- Three two-step fan speed controllers
- Support for eight 3.5”/2.5” storage devices
- Anti-vibration mechanisms for the bottom four 3.5”/2.5” bays on the “H” version of the case
- Thumbscrews for fastening expansion cards
- A huge hole in the motherboard tray for accessing the backplate of the CPU cooler
- Holes for routing cables behind the motherboard tray
- Several clips for fastening cables
Weak Points
- Only one USB 3.0 port
- Plastic parts look cheap
Leave a Reply